Summary and Setup
This is a new lesson built with The Carpentries Workbench.
This workshop will be demonstrated using TeXStudio to write and render LaTeX documents. TeXStudio is a feature-rich, integrated LaTeX writing environment with syntax highlighting, an integrated PDF viewer, and inline error checking. It is available for Windows, macOS, and Linux.
Because TeXStudio is an editor, it needs a separate LaTeX distribution to compile documents. The distribution provides the compilers and various packages which we will use throughout this workshop.
Software Setup
You can find installation instructions for TeXStudio on the TeXStudio website (https://www.texstudio.org/). We include a brief overview of the installation process on this page for convenience, but we recommend that you refer to the official documentation for the most up-to-date instructions, and defer to the official documentation if you encounter any issues during installation.
Windows Installation
Windows users need to install two pieces of software: a LaTeX distribution and TeXStudio.
Step 1 — Install a LaTeX Distribution
A LaTeX distribution provides the compilers and packages needed to build your documents. Two popular options are TeX Live and MiKTeX. You are welcome to choose either distribution, but our demonstration will use TeX Live.
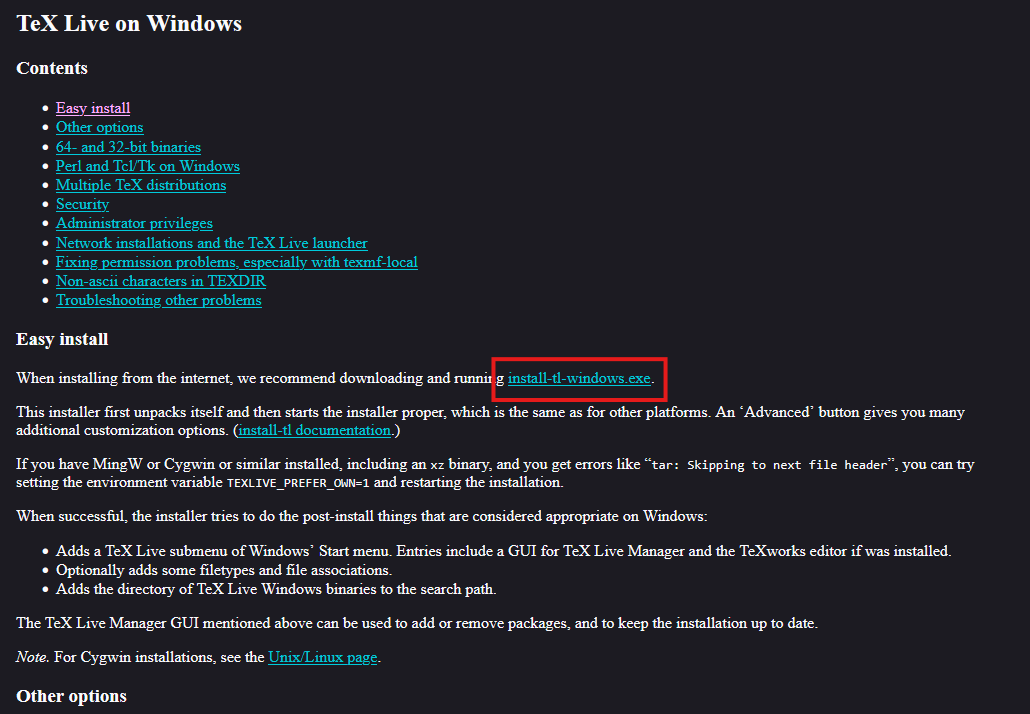
Visit the TeX Live website (https://www.tug.org/texlive/windows.html) and download the “install-tl-windows.exe” installer.
Run the installer. When the dialog appears, select “Install” and click “Next”.
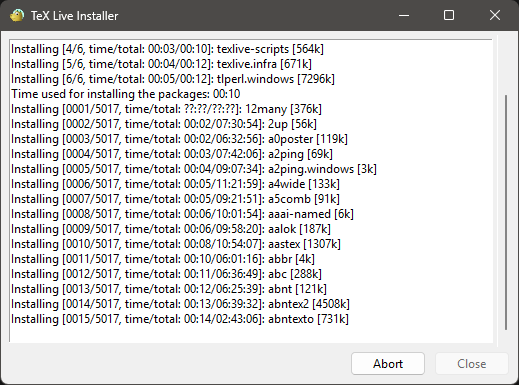
Click “Install” to begin the installation process. This will unpack some files before opening a new window called the “TeX Live Installer”.
If desired, you can change the installation directory by clicking on the “Change” button.
Note that the full TeX Live installation is large (over 5 GB) and may take some time to download and install, depending on your internet connection and computer speed.
When the installation is complete, you can close the installer windows.
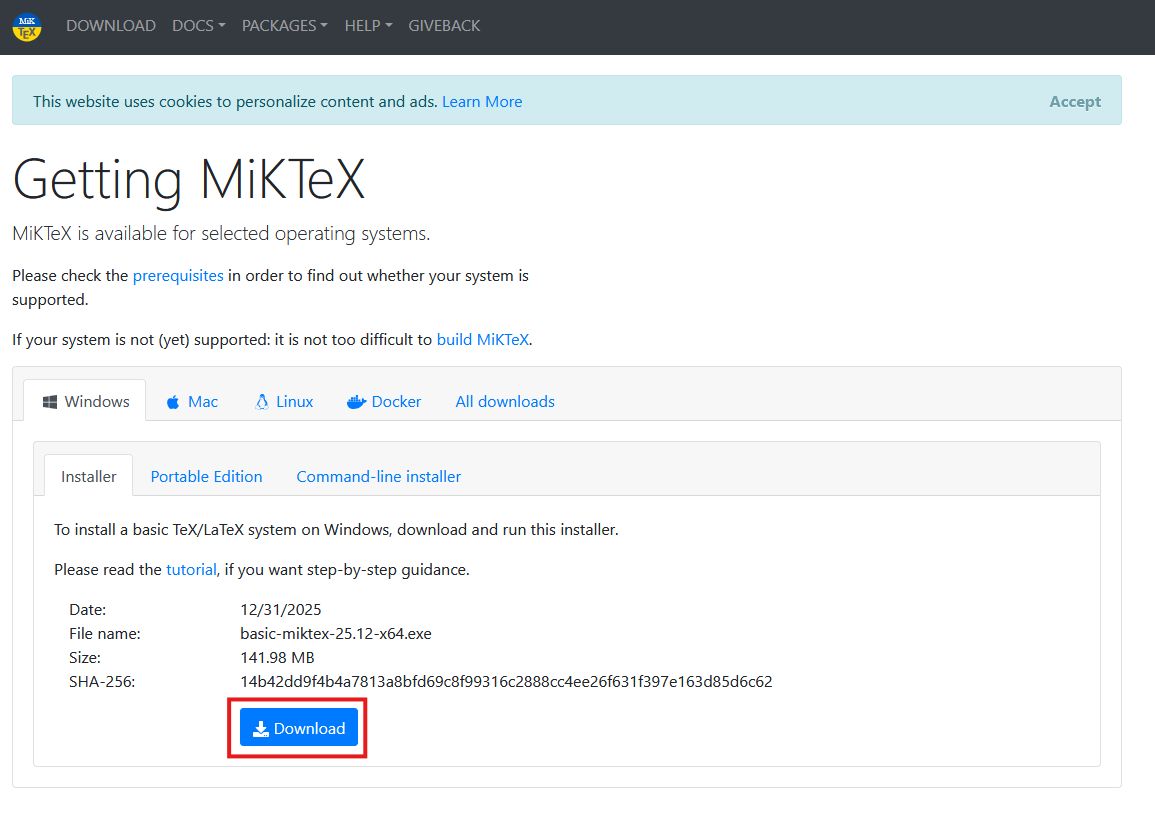
Visit the MiKTeX website (https://miktex.org/download) and download the Windows installer.
Run the installer and follow the prompts. Installing for all users (rather than just the current user) is recommended if you have administrator rights on your machine. Keep the remaining default options.
When the installation is complete, you can close the installer.
Step 2 — Install TeXStudio
Visit the TeXStudio website (!!! link to the TeXStudio download page)
to download the latest installer for Windows. For most machines,
download the 64-bit Windows installer (x86_64).

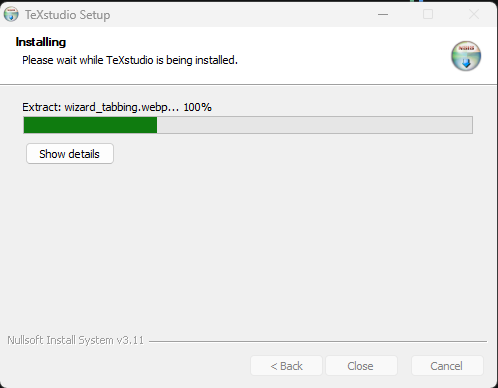
Run the downloaded .exe file. Click “Next” through the
prompts, then click “Install”. When the installation is complete, click
“Finish”.
macOS Installation
macOS users need to install two pieces of software: MacTeX (the LaTeX distribution) and TeXStudio.
Step 1 — Install MacTeX
Visit the MacTeX download page (!!! link to the MacTeX download page at tug.org/mactex) and download the “MacTeX.pkg” file.
Double-click the downloaded “MacTeX.pkg” file to start the installation process. Follow the prompts to complete the installation. The default installation options are recommended for most users.
Step 2 — Install TeXStudioa
Visit the TeXStudio download page (!!! link to the TeXStudio download page) and download the macOS version. Two builds are available: one for Intel Macs and one for Apple Silicon (M1/M2/M3) Macs. Download the version that matches your hardware.
Unzip the downloaded file and drag the TeXStudio application into your “Applications” folder.
Note: Because TeXStudio is distributed without an Apple Developer signature, macOS may display a warning that it cannot verify the developer. If this happens, do not double-click the icon. Instead, hold Control, click the TeXStudio icon, and select “Open” from the context menu. A dialog will appear asking you to confirm that you want to open the application; click “Open”.
Unix/Linux Installation
Linux users need to install two pieces of software: TeX Live (the LaTeX distribution) and TeXStudio.
Step 1 — Install TeX Live
Install TeX Live using your distribution’s package manager. The
texlive-full package is recommended for this workshop, as
it includes all of the packages used in the exercises.
Debian/Ubuntu:
Fedora/RHEL:
Note that the full TeX Live installation is large and the download may take some time.
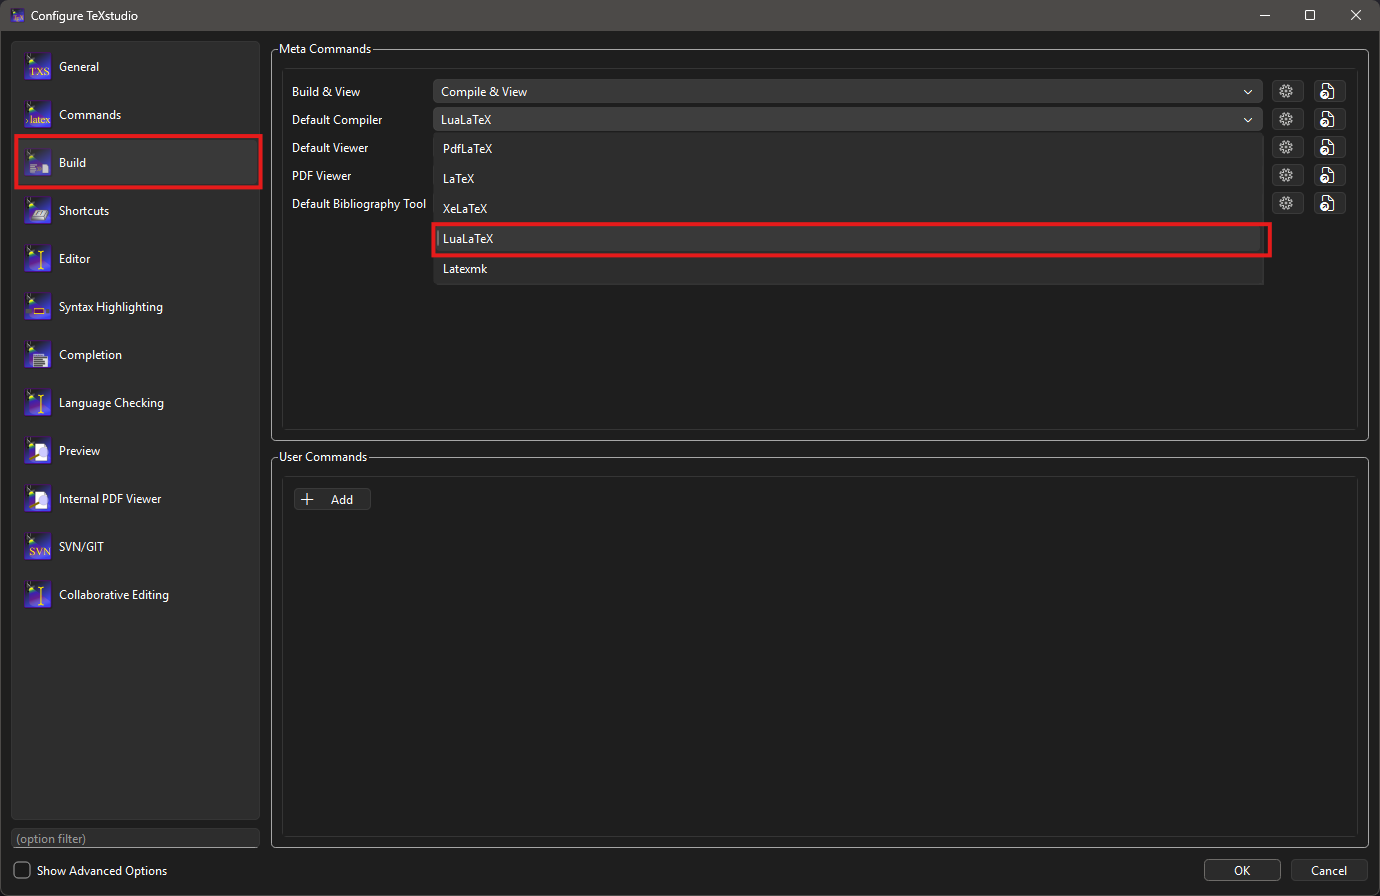
Configure the Default Compiler
TeXStudio defaults to pdfLaTeX as its compiler. This workshop uses
LuaLaTeX, which supports modern font handling
(including the fontspec package) and is required for some
exercises. You should change the default compiler before you begin.
Open TeXStudio and go to Options > Configure TeXstudio… (on macOS: TeXstudio > Preferences…).
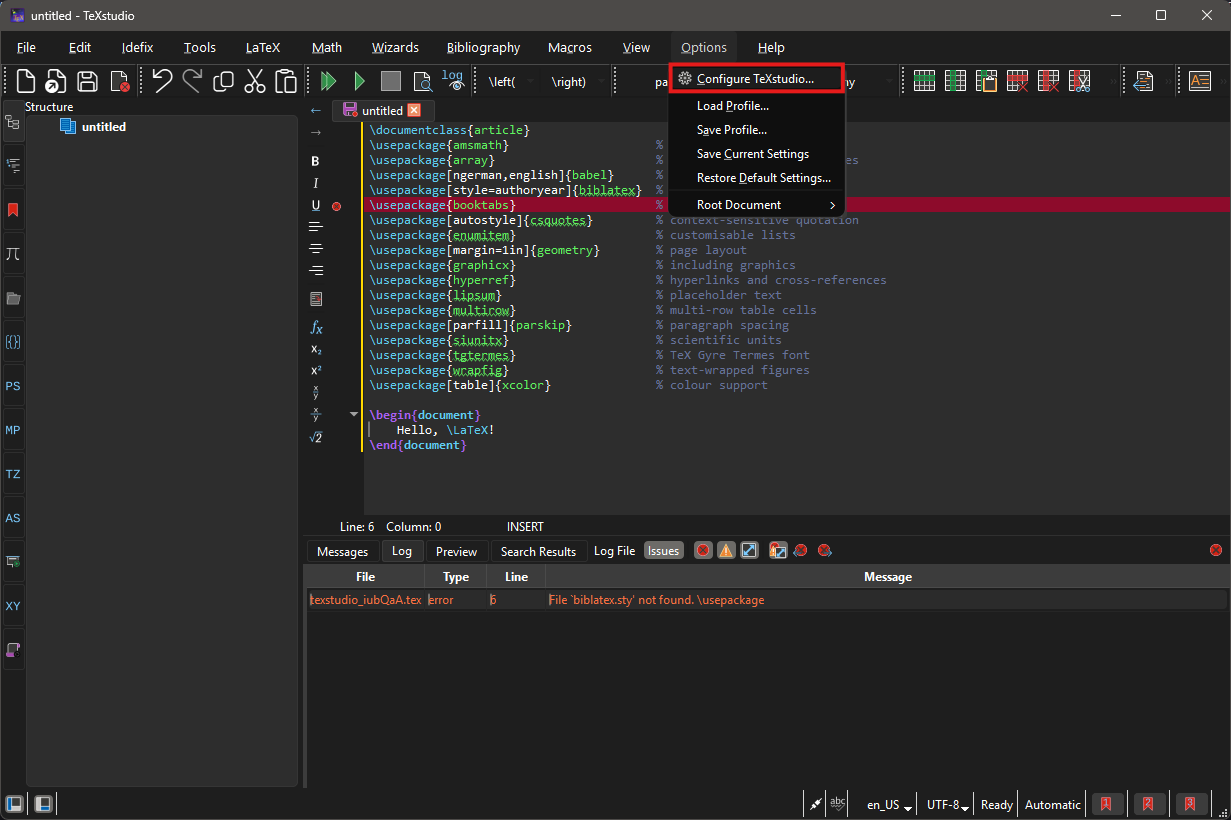
In the configuration dialog, select Build from the left-hand panel. Under Default Compiler, open the drop-down menu and select LuaLaTeX.
Click OK to save the change.
Verify Installation
Open TeXStudio. You should see the main editor window with an empty document area.
Create a new file by selecting “File” > “New” (or pressing
Ctrl+N) and paste the following code into the editor. This
document loads all of the packages used throughout the workshop, so
compiling it successfully confirms that your installation is
complete.
LATEX
\documentclass{article}
\usepackage{amsmath}                     % mathematics formatting
\usepackage{array}                       % extended table column types
\usepackage[ngerman,english]{babel}      % multilingual support
\usepackage[style=authoryear]{biblatex}  % bibliography management
\usepackage{booktabs}                    % professional table rules
\usepackage[autostyle]{csquotes}         % context-sensitive quotation
\usepackage{enumitem}                    % customisable lists
\usepackage[margin=1in]{geometry}        % page layout
\usepackage{graphicx}                    % including graphics
\usepackage{hyperref}                    % hyperlinks and cross-references
\usepackage{lipsum}                      % placeholder text
\usepackage{multirow}                    % multi-row table cells
\usepackage[parfill]{parskip}            % paragraph spacing
\usepackage{siunitx}                     % scientific units
\usepackage{tgtermes}                    % TeX Gyre Termes font
\usepackage{wrapfig}                     % text-wrapped figures
\usepackage[table]{xcolor}               % colour support

\begin{document}
Hello, \LaTeX!
\end{document}
Press F6 (or select “Tools” > “Build & View”) to compile the document. TeXStudio will run the LaTeX compiler and, if successful, display the resulting PDF in the panel to the right of the editor.
If you see the text “Hello, LaTeX!” in the PDF panel, your installation is working correctly.
Troubleshooting
If you encounter an error during compilation like
“texstudio_iubQaA.tex: error: 6: File
biblatex.sty' not found. \usepackage”, this indicates that
you are missing some of the required LaTeX packages and will need to
install them in your distribution. This will depend on the distribution
you chose earlier.
Backup Option: Overleaf
If you are unable to install software on your device (for example, because it is a managed or corporate machine), you can use Overleaf as a browser-based alternative. Overleaf is a free, online LaTeX editor — no installation is required, and it works in any modern web browser.
Using Overleaf Instead of a Local Installation
Please note that local installation of TeXStudio is strongly preferred for this workshop, as some exercises may rely on features or file access that are not available in the browser-based environment. Use Overleaf only if you cannot install software on your machine.