Using Graphics
Last updated on 2025-07-01 | Edit this page
Estimated time: 12 minutes
Overview
Questions
- How do I include images in a LaTeX document?
Objectives
- Demonstrate how to include images in a LaTeX document.
- Show how to position images manually / automatically in a LaTeX document.
The Graphicx Package
In order to use graphics in our document, we’ll need to use the
graphicx package, which adds the
\includegraphics command to LaTeX. We’ll add this to the
preamble of our document:
We can now include several types of images in our document, including:
- JPEG
- PNG
- EPS
For the purposes of this lesson, we’ll use the following image:

Callout
Download this image to your computer either be right-clicking on the image and selecting “Save Image As…” or by clicking on the image and saving it from the browser.
You can use any image you like for this lesson. Just make sure to
replace example-image.PNG with the name of your image in
the following examples.
Uploading Images to Overleaf
In order to incorporate an image into our document, we’ll need to upload it to Overleaf. We can do this by clicking on the “Upload” icon on the upper left corner of the Overleaf editor:

We can then either drag and drop the image into the upload window or click on the “Select files” button to choose the image from our computer.
Once you have uploaded the image, you should see it in the “Files” section of the Overleaf editor:
You can also use the “From external URL” option to add an image directly from a URL, which would let you use an image from a website directly without having to download it first.
Including an Image in a LaTeX Document
Now that we have our image uploaded, we can include it in our
document using the \includegraphics command:
LATEX
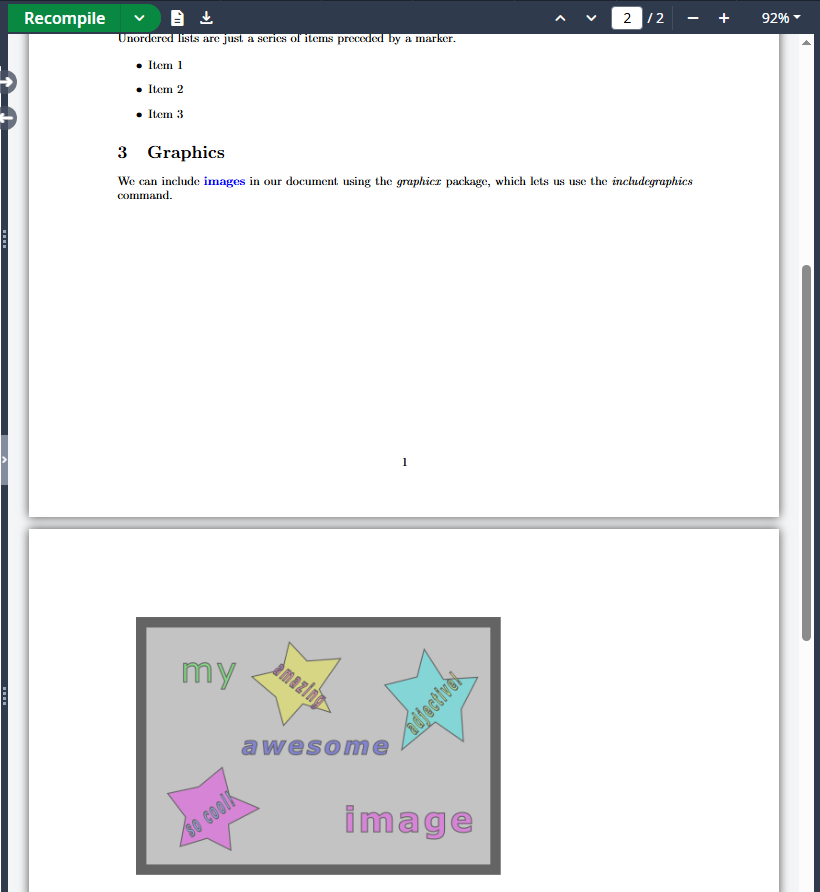
\section{Graphics}

We can include \kw{images} in our document using the \cmd{graphicx} package, which lets us use the
\cmd{includegraphics} command.

\includegraphics{example-image.PNG}
Your document should now look like this:
Callout
If you just want to see how an image might look in your document
without having to upload one, you can use the filepath
example-image in the \includegraphics command.
This will display a placeholder image in your document that you can
replace later.
Adjusting the appearance of the image
But wait! The image is too big, and it doesn’t fit on the page, so LaTeX has moved it to the next page. Since the image is a little too large to fit on the same page as the text, LaTeX has moved it automatically to the next page. Let’s address that by making the image smaller.
We can adjust the appearance of the image by passing options to the
\includegraphics command, just like we did earlier with the
geometry package. For example, we can specify the height of
the image:
LATEX
\subsection{Small Image}

We can pass parameters to the \cmd{includegraphics} command to adjust the appearance of the image.

\includegraphics[height=2cm]{example-image.PNG}

Other possible options include:

\begin{itemize}
  \item width: the width of the image
  \item scale: the scaling factor of the image
  \item angle: the angle of rotation of the image
  \item clip: whether to clip the image to its bounding box
  \item trim: trim the image by a specified amount
  \item draft: display a box instead of the image
\end{itemize}
Callout
Some other possible options from the graphicx package
include:
-
width: the width of the image -
scale: the scaling factor of the image -
angle: the angle of rotation of the image -
clip: whether to clip the image to its bounding box -
trim: trim the image by a specified amount -
draft: display a box instead of the image
Positioning the image
We can place the image inside of an environment to help position it
in the document. Let’s try placing the \includegraphics
command inside of a \begin{center} and
\end{center} environment:
LATEX
\subsection{Centered Image}

By placing the \cmd{includegraphics} command inside a center environment, we can center the
image on the page.

\begin{center}
  \includegraphics[height=2cm]{example-image.PNG}
\end{center}
You should see that the image is now centered on the page:

“Floating” Images
It’s often the case that images need to “float” around the document as new text is added or removed. this is called a “floating” image. Images are normally included as floats so that we don’t end up with large gaps in the document.
To make an image float, we can use the figure
environment:
LATEX
\subsection{Floating Image}
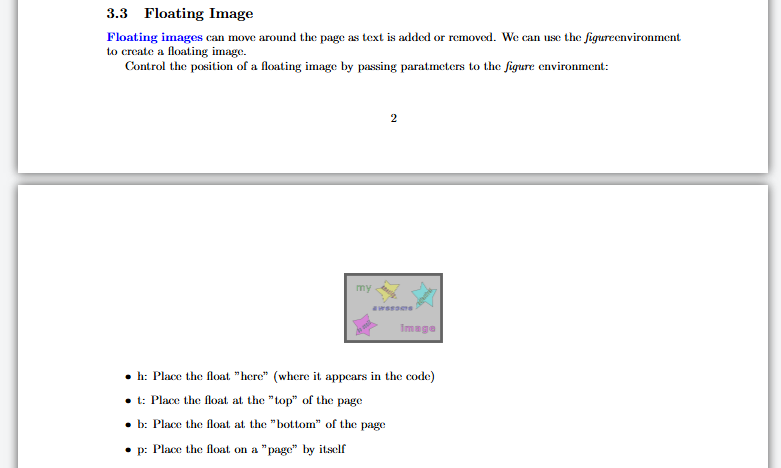
\kw{Floating images} can move around the page as text is added or removed. We can use the
\cmd{figure}environment to create a floating image.
\begin{figure}
\centering
\includegraphics[height=2cm]{example-image.PNG}
\end{figure}When we render the document, we can see that, even though we placed the image at the end of the document, it appears at the top of the page:
Callout
You might have noticed that instead of using the
\begin{center} and \end{center} environment,
we used the \centering command inside of the
figure environment. This is because the figure
environment is a floating environment, and the \centering
command is the recommended way to center content inside of a floating
environment.
Controlling the Position of a Floating Image
We can pass parameters to the figure environment to
control the position of the floating image:
-
h: Place the float “here” (where it appears in the code) -
t: Place the float at the “top” of the page -
b: Place the float at the “bottom” of the page -
p: Place the float on a “page” by itself
It is also possible to combine these options. For example, to place
the float here if possible, but otherwise at the top of the page, we can
use the ht option. Let’s update our figure
environment to use the ht option:
LATEX
\begin{figure}[ht]
  \centering
  \includegraphics[height=2cm]{example-image.PNG}
\end{figure}

Control the position of a floating image by passing parameters to the \cmd{figure} environment:

\begin{itemize}
  \item h: Place the float "here" (where it appears in the code)
  \item t: Place the float at the "top" of the page
  \item b: Place the float at the "bottom" of the page
  \item p: Place the float on a "page" by itself
\end{itemize}
Callout
You can use the package wrapfig together with
graphicx in your preamble. This makes the
wrapfigure environment available and we can place an
\includegraphics command inside it to create a figure
around which text will be wrapped. Here is how we can specify a
wrapfigure environment:
We will describe the wrapfigure environment in more
detail in one of the challenges below.
Adding a Caption
We can add a caption to our image by using the \caption
command inside of the figure environment:
LATEX
\subsection{Caption}
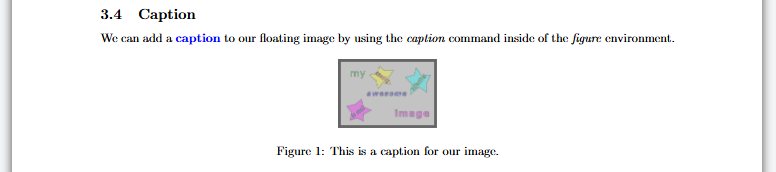
We can add a \kw{caption} to our floating image by using the \cmd{caption} command inside of the
\cmd{figure} environment.
\begin{figure}
\centering
\includegraphics[height=2cm]{example-image.PNG}
\caption{This is a caption for our image.}
\end{figure}When we render the document, we can see that the caption appears below the image:
Callout
Note that the caption is automatically numbered “Figure 1”. Very handy! We’ll see how we can automatically reference figures and tables in a later episode.
Another package that we can use to work with images in LaTeX is the
hvfloat package. This package is an alterantive way of
controlling the position of floating elemnents in LaTeX, like images and
tables. It provides a more flexible way of positioning floats allowing
us to, for example, place a float at the bottom of the page, even if
there is not enough space for it to fit.
Challenges
Challenge 1: Can you do it?
Consider again our running example of example-image.PNG.
Include this image into your LaTeX document by using the
figure environment. Make sure that your image is centered
and rotate the image by 45 degree. Add the following caption to your
image: “This caption has a bold word included.” How
would your LaTeX look like?
We use the \centering command in the figure
environment and specify angle=45 to rotate the image.
Challenge 2: What is wrong here?
Have a look at the following LaTeX code:
LATEX
\documentclass{article}

\begin{document}

\centering
\begin{figure}
  \includegraphics[height=3cm, draft]{example-image.PNG}
  \caption{This caption has a \textbf{bold} word included.}
\end{figure}

\end{document}
Can you spot all the errors in this LaTeX code? Change the code such that the image is displayed with a height of 3cm, width of 4cm and centered.
First, the command \usepackage{graphicx} is missing in
the preamble. Second, the \centering command has to be
placed into the figure environment. Third, the
draft argument has to be removed from and
width=4cm added to the \includegraphics
command.
The corrected LaTeX code looks like this:
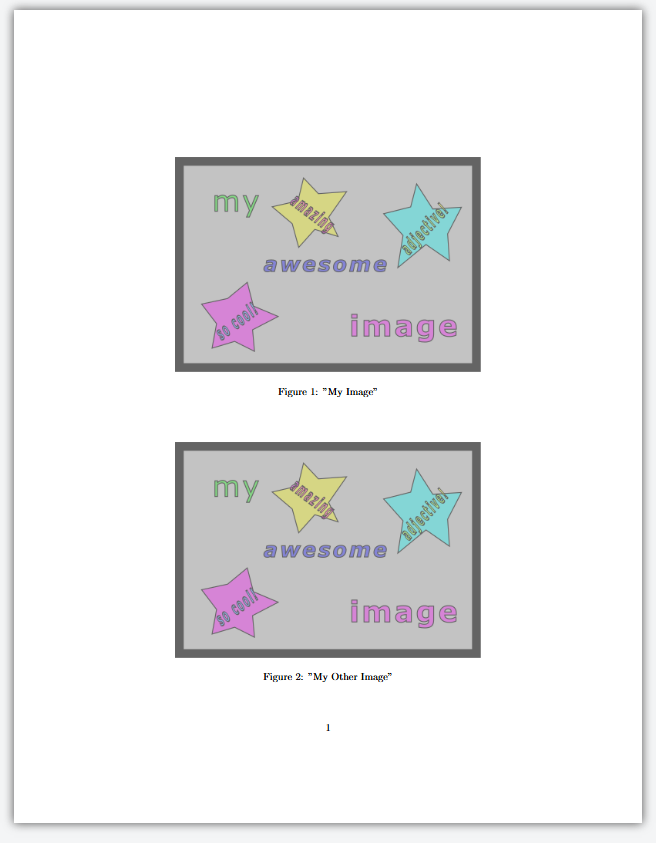
Challenge 3: Making a command for images
In the previous section, we created a command to highlight keywords
in our document. Let’s create a new command to make it easier to include
images in our document. We’ll create a command called
\centeredimage that takes two arguments: the image filename
and the caption. The resulting image should be centered on the page and
have a caption below it. Use the example-image.png from earlier in this
episode.
Your file should look like this:
LATEX
\documentclass{article}
\usepackage{graphicx}

% Define our new command
%%% YOUR COMMAND HERE %%%

\begin{document}

\centeredimage{example-image.png}{"My Image"}
\centeredimage{example-image.png}{"My Other Image"}

\end{document}
And your output should look like this.
Reminder: The syntax for creating a new command is:
LATEX
\documentclass{article}
\usepackage{graphicx}

% Define our new command
\newcommand{\centeredimage}[2]{
  \begin{figure}
    \centering
    \includegraphics{#1}
    \caption{#2}
  \end{figure}
}

\begin{document}

\centeredimage{example-image.png}{"My Image"}
\centeredimage{example-image.png}{"My Other Image"}

\end{document}
Challenge 4: The wrapfig
package.
Have a look at the following LaTeX code that uses the
wrapfigure environment. Can you already guess how the
images will be displayed in your document?
LATEX
\documentclass{article}

\usepackage{wrapfig}
\usepackage{graphicx}

\begin{document}

\begin{wrapfigure}{r}{0.1\textwidth}
    \centering
    \includegraphics[width=0.1\textwidth, height=0.1\textwidth]{example-image.PNG}
\end{wrapfigure}

The package wrapfigure lets you position images around your text.
That comes in handy if you want to integrate images seamlessly into your written sentences.
Therefore, I add a few more sentences here to showcase this integration to you.

\begin{wrapfigure}{l}{0.1\textwidth}
    \centering
    \includegraphics[width=0.1\textwidth, height=0.1\textwidth]{example-image.PNG}
\end{wrapfigure}

Be careful, you need both packages, wrapfig and graphicx, in your preamble to display your images
and wrap them accordingly. There are several ways to display images, depending on the arguments you
specify. For instance, you can scale the image width according to the width of the text.

\end{document}The first image will be placed at the right of the following
paragraph of text as {r} is specified as an argument within
the first wrapfigure environment. The second image will be
placed at the left of its following paragraph of text as
{l} is specified as an argument within the second
wrapfigure environment. Moreover, both images are scaled by
being 0.1 of the width of the text in your document.
Key Points
- The
graphicxpackage allows us to include images in our LaTeX document. - We can adjust the appearance of images using options in the
\includegraphicscommand. - We can position images manually or automatically using environments
like
centerandfigure. - Floating images can move around the page as text is added or removed.
- We can control the position of floating images using parameters in
the
figureenvironment. - We can add captions to floating images using the
\captioncommand.
After this episode, here is what our LaTeX document looks like.