
Virtual Environments
Last updated on 2026-06-23 | Edit this page
Estimated time: 0 minutes
Overview
Questions
- What is a Virtual Environment? / Why use a Virtual Environment?
- How do I create a Virtual Environment?
Objectives
- Create a new virtual environment using
uv - Push our new project to a GitHub repository.
What is a Virtual Environment?
A virtual environment is an isolated workspace where you can install python packages and run python code without worrying about affecting the tools, executables, and packages installed in either the global python environment or in other projects.
What is the difference between a “package manager” and a “virtual environment”?
A package manager helps automate the process of installing, upgrading, and removing software packages. Each package is usually built on top of several other packages, and rely on the methods and objects provided. However as projects are upgraded and changed over time, the available methods and objects can change. A package manager solves the complex “dependency web” created by the packages you would like to install and finds the version of all required packages that meets your needs.
Why Would I use a Virtual Environment?
If you are only ever working on your own projects, or on scripts for a single project, it’s absolutely fine to never worry about virtual environments. But as soon as you start creating new projects working on code written by other people, it becomes incredibly important to know that the code that you are running is running on the exact same versions of libraries.
In the past, it was notoriously difficult to manage environments with python:
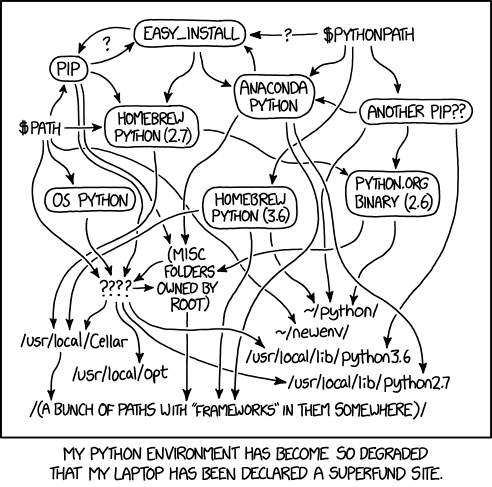
There have been a number of attempts to create a “one size fits all” approach to virtual environments and dependency management:
- venv
- virtualenv
- conda
- pipenv
- pyenv
- poetry
We’re going to use uv for the purposes of this workshop. UV is a another tool that promises to slot in to the needs of environment and dependency management, however there are a few key elements that set it apart:
- It is written in Rust, which gives it a significant speed improvement over pip and conda.
- It works with the
pyproject.tomlanduv.lockfiles, which allow for human and computer readable project files. - It can install and manage its own python versions.
- It works as a drop-in replacement for pip, eliminating the need to learn new commands.
Creating a project with UV
Before the workshop, you should have had a chance to install and check that your python and uv executables were working. If you have not yet had a chance to do this, please refer to the setup page for this workshop.
We’re going to start with a totally blank project, so let’s create a
directory called “textanalysis-tool”. Navigate to this directory in your
command line. Let’s quickly make sure we have UV installed and working
by typing uv --version. You should see something like the
following (the exact version number might be different):
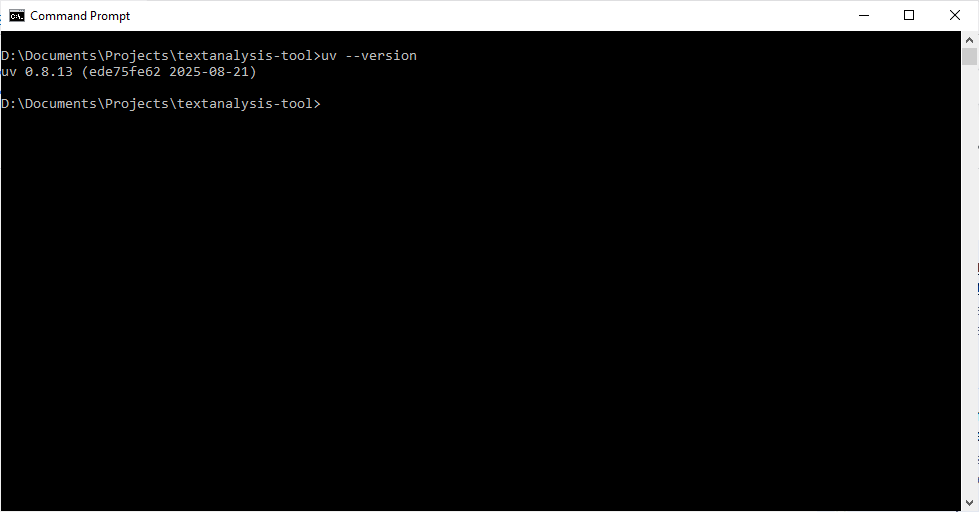
If you are using an older version of uv, it should still
work for the purposes of this workshop, but some of the outputs might
look different. Updating uv to the latest version will
depend on how you installed it.
- If you installed
uvwithpip, you can update it withpython -m pip install --upgrade uv. - If you installed
uvfrom binaries, you can useuv self update.
We can start off with a new project with UV by running the command
uv init. This will automatically create a couple files for
us:
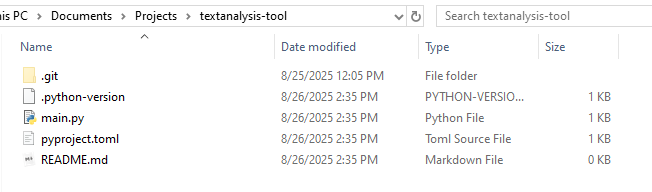
We can see that there are a few files created by this command:
-
.python-version: This file is used to optionally specify the Python version for the project. -
main.py: This is the main Python script for the project. -
pyproject.toml: This file is used to manage project dependencies and settings. -
README.md: This file contains human written information about the project. -
.gitignore: (Depending on your version of uv) This file specifies files and directories that should be ignored by git.
If we take a look at the pyproject.toml file, we can see
that it contains some basic information about our project in a fairly
readable format:
TOML
[project]
name = "vehicle-module-{my-name}"
version = "0.1.0"
description = "Add your description here"
readme = "README.md"
requires-python = ">=3.13"
dependencies = []
The requires-python field may vary depending on the
exact version of python you’re working with.
Make sure to change {my-name} in the name
field to something unique, such as your GitHub username. This is
important later when we upload our package to TestPyPI, as package names
must be unique.
Creating a Virtual Environment
To create a virtual environment with UV, we can use the
uv venv command. This will create a new virtual environment
in a directory called .venv within our project folder.
Before we activate our environment, let’s quickly check the location of the current python executable you are using by starting a python interpreter and running the following commands:
Depending on your operating system, you may need to type
python3 instead of python to start the
interpreter.
You should see something like this: 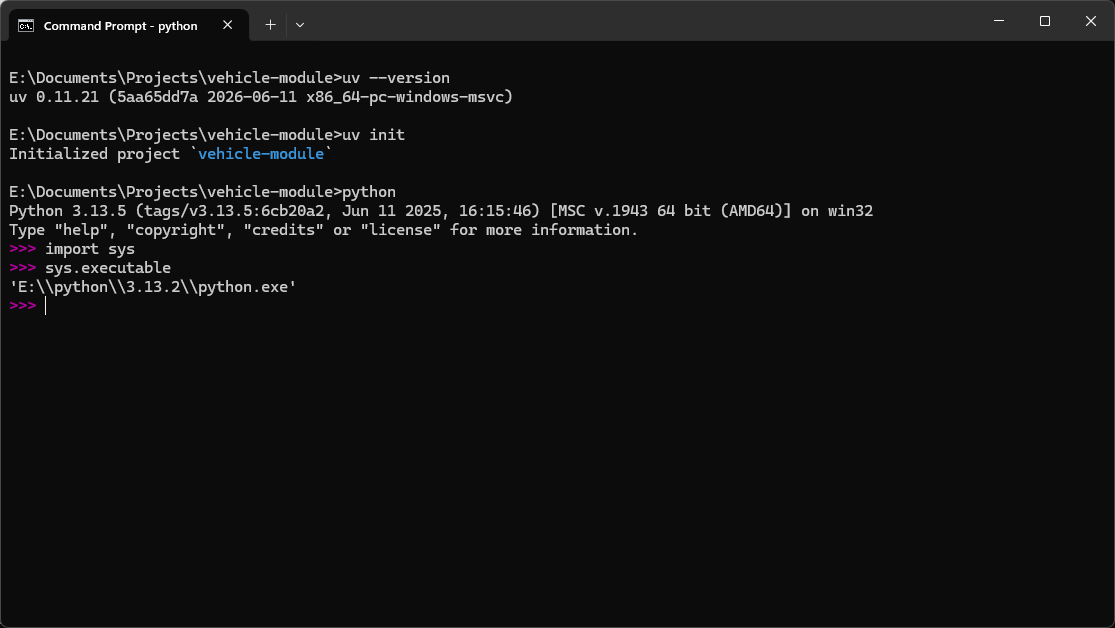
You can type exit to leave the python interpreter
The value printed after sys.executable will be the path
to the python executable that is started when you run the python
interpreter from your terminal. Now let’s activate our environment. The
exact command will depend on your operating system, but if you look
above the python code to the output of the uv venv command,
you should see the correct command.
If this command works properly, you should see that before your prompt is now some text in parenthesis:
(vehicle-module) E:\Documents\Projects\vehicle-module>Let’s start up the python interpreter again and check the location of our executable:
What you should now see is that the executable is located in the .venv/Scripts directory of our project:
(vehicle-module) E:\Documents\Projects\vehicle-module>python
Python 3.13.5 (main, Jun 12 2025, 12:42:35) [MSC v.1943 64 bit (AMD64)] on win32
Type "help", "copyright", "credits" or "license" for more information.
>>> import sys
>>> sys.executable
'E:\\Documents\\Projects\\vehicle-module\\.venv\\Scripts\\python.exe'
Exit out of the interpreter and deactivate the virtual environment
with deactivate.
Git Commit and Pushing to our Repository
Some versions of uv will automatically create a
.gitignore file when you run uv init. If you
don’t see one in your project folder, you can create one manually.
We also want to create another file called .gitignore,
to control which files are added to our git repository. It’s generally a
good idea to create this file early on, and update it whenever you
notice files or folders you want to explicitly prevent from being added
to the repository.
We can create a gitignore from the command line with
type nul > .gitignore (Windows), or
touch .gitignore (Mac/Linux). There are several pre-written
gitignores that we can optionally use, but for this project we’ll
maintain our own. Open up the file and add the following lines to
it:
__pycache__/
dist/
*.egg-info/
scratch/A commonly used gitignore is the Python.gitignore maintained by GitHub. You can find it here: Python.gitignore from GitHub.
Next, let’s set up a repository on GitHub to store our code. We’ll make an entirely blank repository, with the same name as our project: “vehicle-module”.
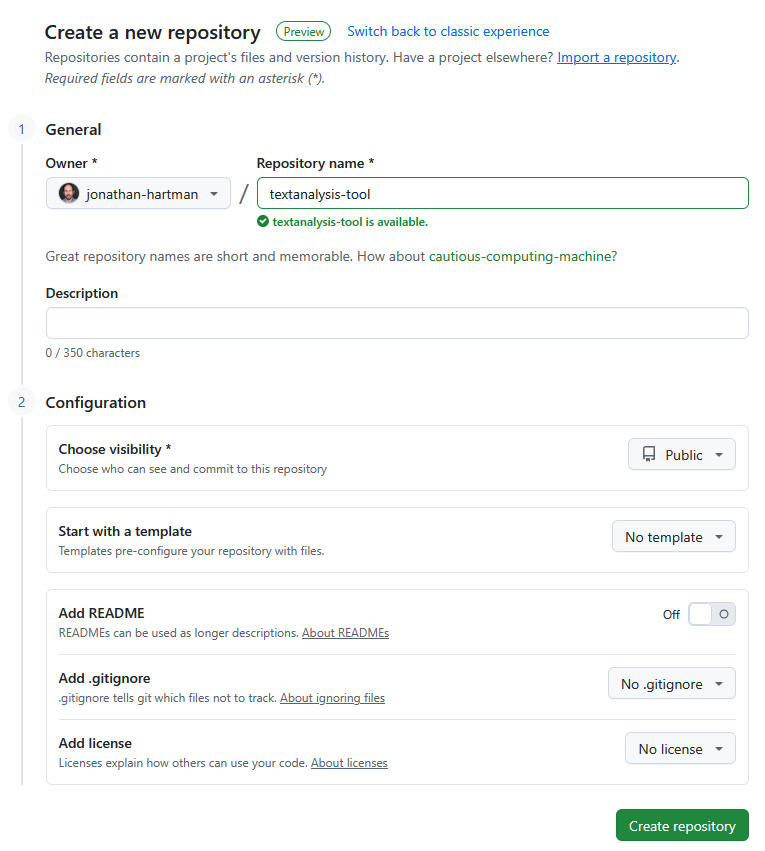
We’re creating the files on our local machine first, then the remote repository. There’s no reason you can’t go the other way around, creating the remote repository then cloning it to your local machine.
If you are using an older version of uv, the .git folder
may not be created as part of the uv init command. If this
is the case, you can create a git repository with the command
git init.
First, we’ll make an initial commit with the files that uv generated:
git add .gitignore .python-version README.md main.py pyproject.toml
git commit -m "Initial commit"
Then we’ll follow the directions for creating a new repository:
git remote add origin https://github.com/{username}/vehicle-module.git
git branch -M main
git push -u origin mainWe are using https for our remote URL, but you can also
use ssh if you have that set up.
If all goes well, we’ll see our code appear in the new repository:
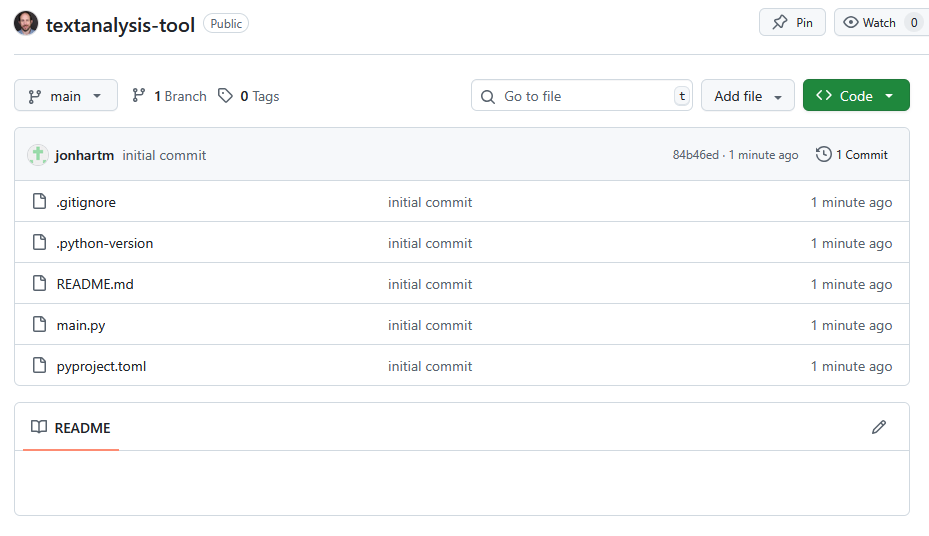
And with that, we’re ready to start writing our tool!
Challenge 1: Adding a Package Dependency
Now that we have our project set up, let’s add a project dependency.
Let’s say we needed to pull down data from a web API. We could use the
built-in urllib module, but it can be a bit clunky to work
with. A popular alternative is the requests package, which
provides a much nicer interface for making HTTP requests. Let’s add
requests to our project with UV.
Try the following command
uv add requestsTake a look at the pyproject.toml and
uv.lock files. What changed? What is the purpose of each
file?
The pyproject.toml file is a human readable file that
contains the list of packages that our project depends on. The
uv.lock file is a machine readable file that contains the
exact versions of all packages that were installed, including any
dependencies of the packages we explicitly installed.
Challenge 2: Adding a Package Dependency to a Group
Later on in this workshop, we will be writing some tests for our code
using the pytest package.
Try the following command:
uv add pytest --group devTake a look at the pyproject.toml and
uv.lock files. What changed? What is different about this
package compared to the requests package we installed in
the previous challenge? Why might this be useful?
- Setting up a virtual environment is useful for managing project dependencies.
- Using
uvsimplifies the process of creating and managing virtual environments. - There are several options other than
uvfor managing virtual environments, such asvenvandconda. - It’s important to version control your project from the start,
including a
.gitignorefile.