Extending LaTeX
Last updated on 2025-07-01 | Edit this page
Overview
Questions
- How can I extend LaTeX to suit my needs?
- How can I define my own commands in LaTeX?
Objectives
- Demonstrate how to extend LaTeX using packages.
- Add custom commands to a LaTeX document.
Adding Packages
After we’ve declared a class, we can use the preamble section of our document to add one or more packages in order to extend LaTeX’s functionality. Packages are collections of commands and environments that add new features to LaTeX, for example:
- Changing how some parts of LaTeX work.
- Adding new commands.
- Changing the appearance/design of the document.
We can add a package to our document by using the
\usepackage command in the preamble of our document. For
example, to add the geometry package to our document, we
would add the following line to the preamble:
In addition to the name of the package in the curly braces, we can also add options to the package by adding them in square brackets before the package name. For example, to set the width of the text block in our document to 6cm, we would update this line to look like this:
Give this a try in our main.tex document to see what
happens. When you render the document, you should see something like
this:

However this isn’t what we really want, so we’ll remove this line from our document.
Changing the Design
It’s useful to be able to adjust some aspects of the design
independent of the document class, for example, the page margins. We
used the geometry package in our previous example to set
the width of the text block, but now let’s use it to specifically set
the margins of our document:
Callout
So far we’ve been showing the entire document in the examples. Going
forward, we’ll only show the relevant sections of the document that
we’re discussing, so keep in mind when we are talking about “adding this
to the preamble” we mean adding it to the section of the document
before the \begin{document} command.
Let’s add this to the preamble of our document:
You should see that adding this package and setting the “margin”
option to 1in has shrunk the margins of the document (try
commenting out the \usepackage line with a %
and recompiling to see the difference).
Defining Custom Commands
Using other people’s packages is great, but what if there is some
kind of functionality we want to add to our document that isn’t covered
by a package? Or some specific formatting we want to use repeatedly? We
can define our own commands in LaTeX using the \newcommand
command.
The \newcommand syntax looks like this:
Callout
We could be even more flexible by using an optional argument
in our \newcommand. Then the general structure of the
command looks like this
LATEX
\newcommand{\commandname}[number of arguments][default value for the first argument]{definition}You can learn more about optional arguments in the last challenge of this episode.
As an example, let’s define a command that will highlight specific
works in a document, so that they appear italicised and underlined. We
could do this by writing \textbf{\underline{word}}
around each word we want to highlight:
LATEX
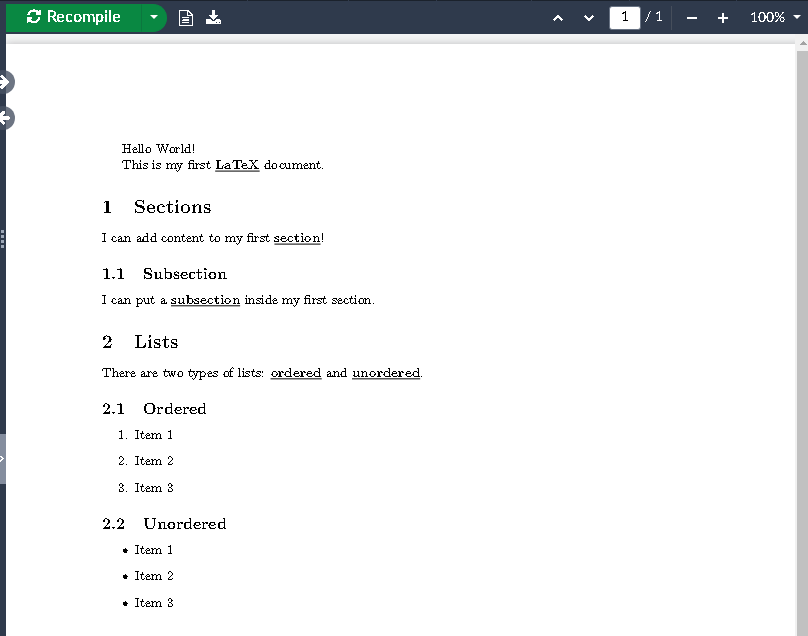
This is my first \textbf{\underline{LaTeX}} document.

\section{Sections}

I can add content to my first \textbf{\underline{section}}!
We can add this to each of our important terms in our document - maybe it looks something like this:
In a long document this would quickly become tedious. Instead, let’s
define a new command called \kw in the preamble of our
document that will do this for us:
LATEX
% The \newcommand defines a new custom command
% Highlight Keywords using the \kw{} command
\newcommand{\kw}[1]{\textbf{\underline{#1}}}
Now we can use the \kw command to highlight words in our
document:
LATEX
This is my first \kw{LaTeX} document.

\section{Sections}

I can add content to my first \kw{section}!
Callout
Let’s take a minute to go through and add the \kw
command to all the keywords in our document.
- LaTeX
- section
- subsection
- lists
- ordered
- unordered
Related to the \newcommand command, we can also use the
\renewcommand command to change the definition of an
existing command. This is useful, for example, if we want to change the
effect of a command partway through a document, or if we want to change
the definition of a command that is already defined in a package. It has
an identical syntax to the \newcommand command:
Code Reuse
This also means that we can easily change the formatting of all the
words we’ve highlighted by updating the definition of the
\kw command. Let’s say we wanted to change the formatting
to bold and change the color to blue:
Let’s replace our \kw command with this new definition:
\newcommand{\kw}[1]{\textcolor{blue}{\textbf{#1}}}
When we recompile the document we should see that the formatting of our keywords has changed all at once:
Defining Multiple Commands
We can define as many commands as we like in the preamble of our document. Let’s add another one that we can use to highlight commands in the document:
We’ll use this command in later sections.
Challenges
Challenge 1: Importing a new package
A useful package to preview what your document will look like before
your write a lot of text is the lipsum package. This
package provides sample text blocks from a common placeholder text.
How would you add the lipsum package to the preamble of your document?
Add the line \usepackage{lipsum} to the preamble of your
document.
You can then use the \lipsum command in the body of your
document to add some dummy text.
Challenge 2: What does this mean?
The definition of a new command in LaTeX is done with the
\newcommand command. The syntax for this command is:
So if we modify the \kw command we defined above to look
like this:
What would the new \kw command do? and how would we use
it?
Challenge 3: Can you write your own command with two arguments?
Suppose you want to define a new command that takes as input two words as arguments. This first word shall be written bold while the second word shall be written italic. Moreover, the first and the second word are separated by a comma followed by a whitespace.
Use \newcommand to define this command that takes two
arguments as inputs and name it \bo_it. Write the following
sentence into your LaTeX document using your new command
\bo_it:
This newly defined command highlights these two words: Apple, Banana.
The new \boit command would take two arguments: the
first argument would be used with \tetxbf{#1} to make the
first word appear bold, and the second argument would
be used with \tetxit{#2} to make the first word appear
italic. Between \tetxbf{#1} and
\tetxit{#2}, we would write , to separate both
words. We would use the new command like this:
Challenge 4: Optional arguments
New commands can be made even more flexible by defining commands that take an optional argument. Then the general LaTeX code for this looks like this:
LATEX
\newcommand{\commandname}[number of arguments][default value for the first argument]{definition}The optional argument can be accessed and changed by writing square
brackets [] directly after the \commandname in
the body of your document.
Consider the following, modified example of our \kw from
before where we now use an optional argument.
In your LaTeX file, use the new \kw command to write
down the words “Banana” in yellow, “Apple” in red, and “Blueberry” in
blue. Each word should be written in a separate line.
We can exploit the optional argument in \kw to write
down the given words very efficiently. For the first word, we change the
optional argument to “yellow”. For the second word, we stick with the
default value of “red”. For the third word, we change the optional
argument to “blue”.
Key Points
- We can extend LaTeX’s functionality by adding packages to our document.
- We can define custom commands in LaTeX using the
\newcommandcommand.
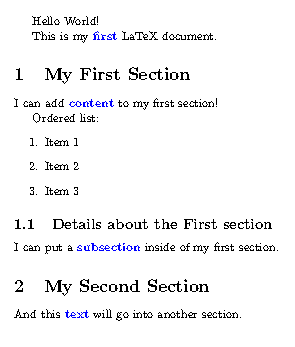
After this episode, here is what our LaTeX document looks like.